
When a controller for an Xbox One begins to drift, it is usual for the player to experience undesired movement while using the device to play games. Because one or both of the thumbsticks may drift, or move, in an undesirable direction even when you are not touching them, this phenomenon is referred to as controller drift, also known as analog stick drift. In order to repair Xbox One Controller Drift, you will need to disassemble the controller and either repair or replace one or more of the components connected to the analog sticks. Let’s find out how.
Table of Contents
The most typical issue concerns Xbox drift in the left analog stick, which in first-person games often expresses itself as your character always gazing up. On the other hand, the right stick may also have drift problems. You can also note that when you move one of the analog sticks in any direction, it will continue detecting that movement even after you remove your thumb from the stick. This is because the analog sticks are pressure-sensitive.
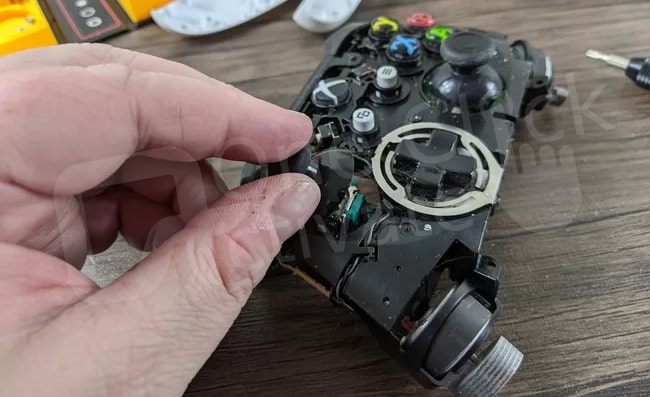
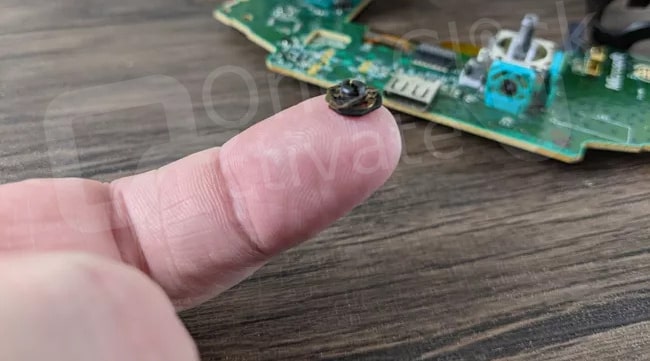
Broken thumbstick pad: Each thumbstick consists of a boxy sensor component that has a moving shaft on top and a rubber or plastic component that snaps onto the shaft. The pad that has seen better days is worn out. In the event that the rubber or plastic component wears out, your drift problem may be fixed by either replacing it or fixing it. A problem of a similar kind may be triggered by filthy thumbstick pads in certain instances.
Broken springs: Each thumbstick sensor component includes two springs that assist in snapping it back to the center whenever you withdraw your thumb. However, over time, these springs get worn out and break. Drift will become noticeable after either one of the springs or both of them get worn out. Changing out the springs in question resolves the issue.
Bad unit for the thumbstick: Each thumbstick is made up of a rectangular sensor component that is connected to the circuit board that the controller is attached. It is conceivable for this component’s internal workings to fail; in which case the only solution is to replace it with a new component.
Also Read: Play Xbox Series X Or S Games On Your PC
You might have to try out a few things in order to repair Xbox One Controller Drift. Let’s find them out.
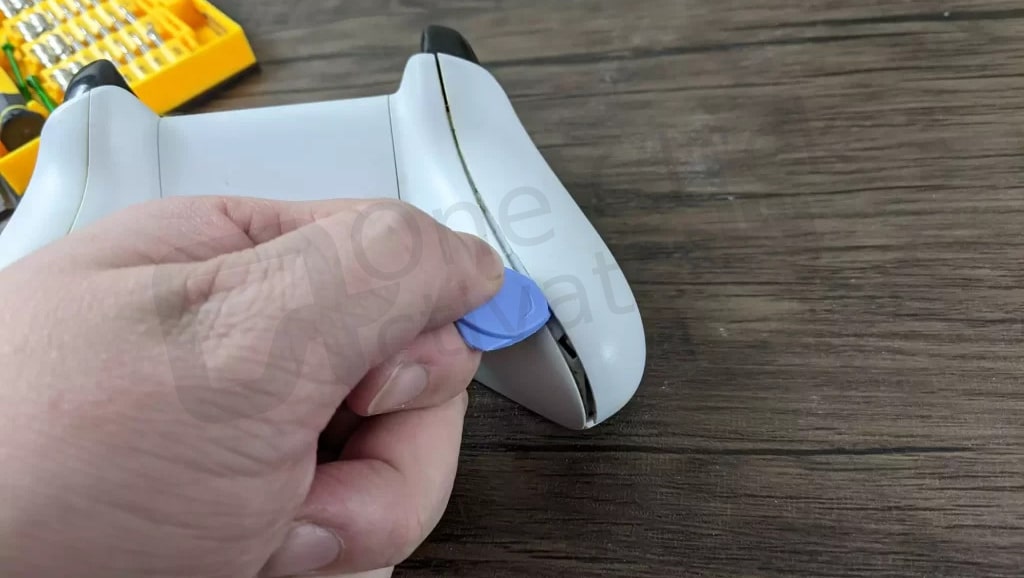
If you notice that the thumbsticks on your Xbox One console are drifting, the very first thing you should do is attempt the options that are the least involved, and then work your way up from there. If it doesn’t fix the problem, you should try another remedy. Even if filthy or worn-out thumbstick pads aren’t the most prevalent cause of this issue, starting here is the greatest place to start since it’s the simplest and quickest item to test out.
In order to do this repair, you will require the following items:

If you have attempted to fix your thumbstick pads but found that they were neither dirty nor loose, then the next fastest alternative is to replace your thumbstick springs. This may be done if you have confirmed that your thumbstick pads are in good condition. If, after attempting to adjust your thumbstick pads, you are still having drift, this is the situation that you are in. If only one of your thumbsticks is experiencing difficulties, the springs on that one thumbstick will be the only thing that has to be replaced.
In order to do this repair, you will require the following items:
Because a large number of controllers, including Xbox 360 controllers, utilize the same analog stick component as the Xbox One controllers, it is possible to use springs from an older controller instead of purchasing new ones. There is also the option to purchase a new analog stick and remove the springs from that controller.
Trending: Xbox Companion App connection with Xbox
There may be times when you discover that either one of your analog sticks, or both of them, have simply become worn out and need replacement. This is a much more difficult repair. And you shouldn’t do it if you aren’t experienced with desoldering and soldering the component that needs to be fixed.
In order to make an effort at fixing this, you will need:
If the problem(s) cannot be fixed by using these instructions, it is possible that you will need to purchase a new controller. At the very least, you’ll have the satisfaction of knowing you gave it your all.
Conclusion: So, this is how you can repair Xbox One Controller Drift at your home. If you find out instructions useful, please leave a thumbs up below.
Published On : September 29, 2022 by: Anjali Latwal/Category(s) : Xbox
Leave a Reply