There’s no shortage of great content on Netflix Kodi Addon. From popular TV shows and movies to original content, you’ll find it all here. But like many other streaming services, Netflix isn’t directly compatible with Kodi. And so, if you want to use Netflix on Kodi, you’ll need to follow a few additional steps.
We’ll show you how to install and utilize Netflix on Kodi in this article. Any Kodi-compatible device, notably Amazon FireStick and Fire TV, NVIDIA SHIELD, Android TV boxes, smartphones, and PCs, can follow the methods in this article. We’ll give you some background on how to get Netflix on Kodi before showing you how to acquire it and use it.
Table of Contents
Before we dive into the steps to install Netflix on Kodi, let’s clear up some misconceptions and questions you might have.
Is it possible to watch Netflix on Kodi?
If you’re on this page, then you’re probably trying to figure out how to get the Netflix Kodi add-on. The good news is that it is possible to watch Netflix content on Kodi! You can watch all of your favorite shows and movies from the comfort of your couch, or wherever you keep your Kodi device.
But before we show you how to get Netflix running on your Kodi device, let’s clear up a few common misconceptions about it.
Can I stream Netflix for free with a Kodi Netflix addon?
No! You will need an active subscription to a paid plan in order to use the Netflix addon for Kodi. There are no official add-ons available that can give you access to Netflix content without paying for a subscription.
Also, please be aware that there are malicious third-party addons that claim they can stream Netflix content for free. These add-ons come with malware and viruses, which have been known to steal information from users. Never download these kinds of add-ons, as they are dangerous and illegal!
If you’ve been looking for a way to install Netflix on Kodi, then we’ve got you covered. In this guide, we will be showing you how to get Netflix on Kodi. You can easily do this by installing the Netflix addon for Kodi. Now, before we go ahead and explain the steps to install Netflix on Kodi, let us first tell you what exactly is Netflix.
Netflix is one of the most widely used streaming services. Netflix has everything from original TV series to all-time classic films. So, what if you combine Netflix with Kodi’s incredible versatility? The end outcome is unrivaled and world-class. Netflix on Kodi comes with a slew of useful features, including library integration, watch status sync, and high-resolution playback.
However, there are certain mind-boggling complications when trying to install Netflix on Kodi. Thankfully, these issues can be tackled by simply installing the right add-ons for Kodi and integrating them with other tools as well.
Also, check out our selected list of 12 best free alternatives to Netflix with their reviews
This guide will be focused primarily on the steps you need to take to install Netflix Kodi Addon. Since Kodi is not officially supported by Netflix, we will have to take resort to a working method to get this done. Installing Netflix Addon on Kodi is relatively simple as long as you follow each step carefully. The installation process for installing Netflix on Kodi requires a little bit of work but once it’s up and running, it’s fully functional and you can use it just like any other app on your PC or Smart TV.
Simply follow the steps outlined below. The Netflix addon will be installed on Kodi by the end of the 3 parts.
1st PROCESS: Create a New Source for the Repository
Firstly, we’ll add a Fusion TV source, which has the Netflix CastagnaIT repository.
So, let’s get this party started:
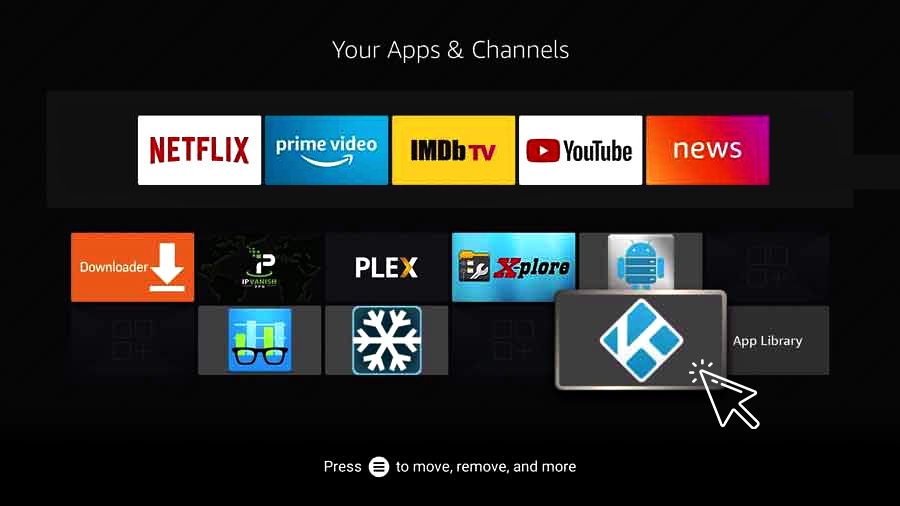
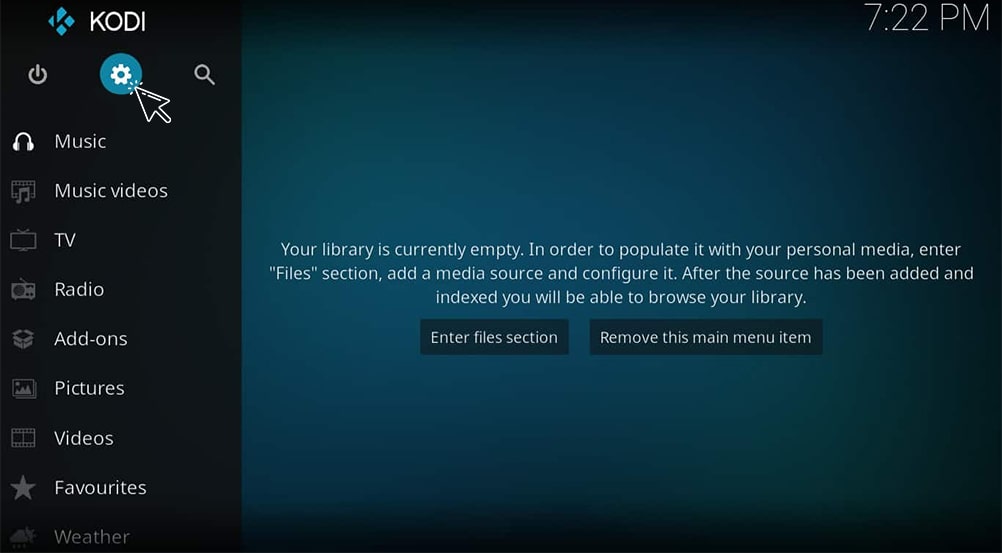
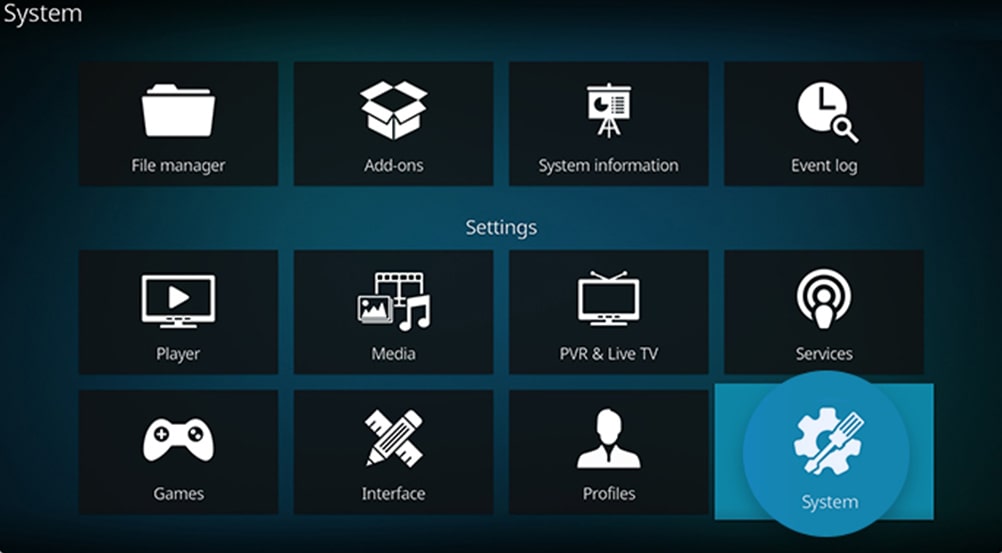
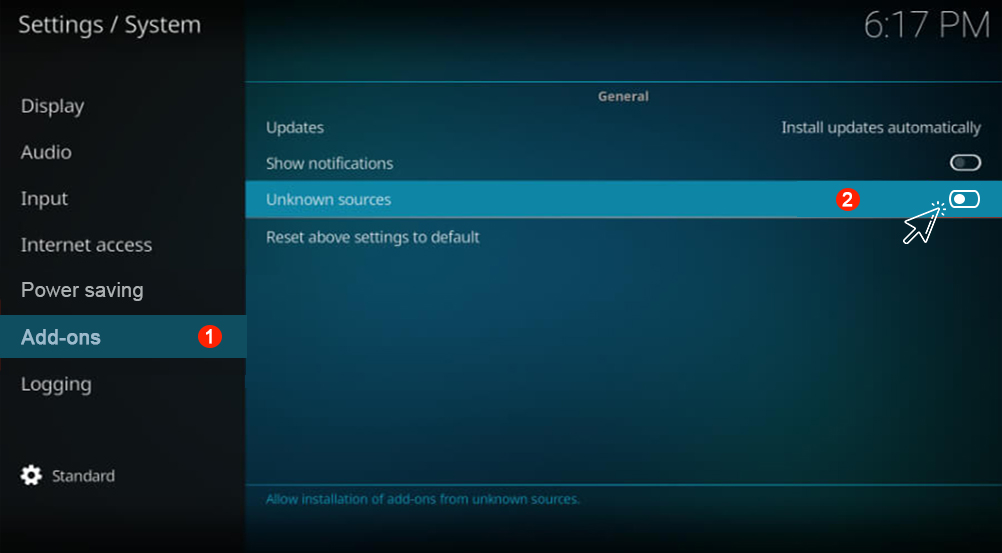
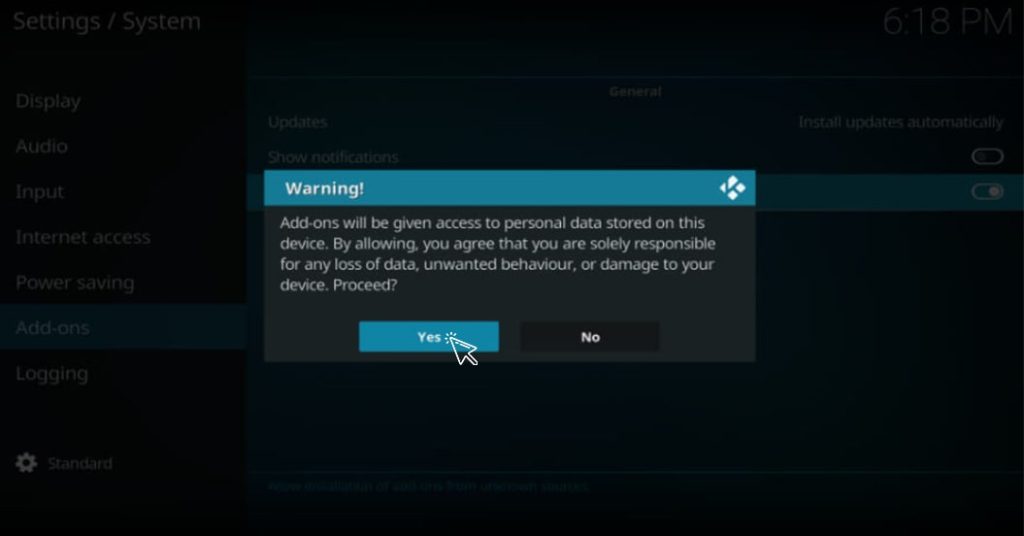
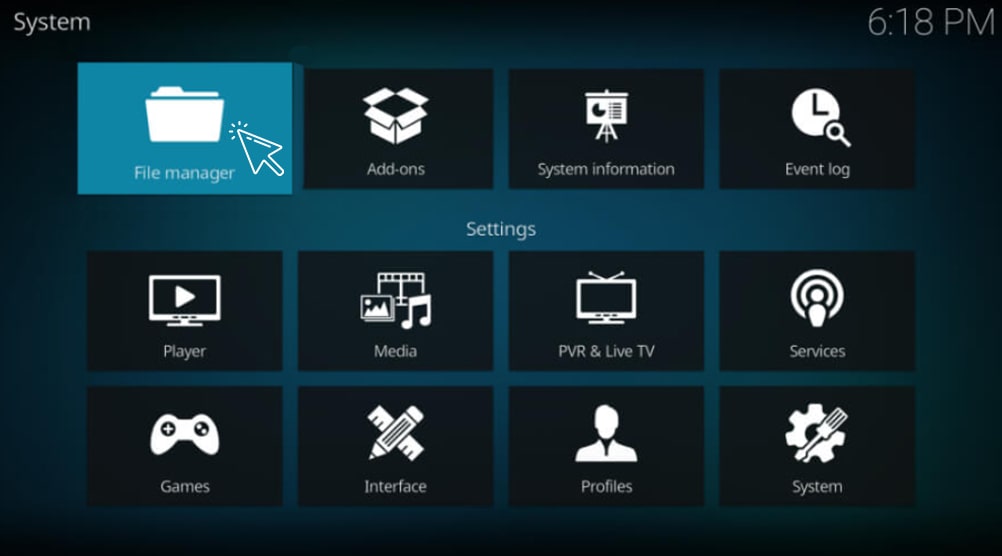
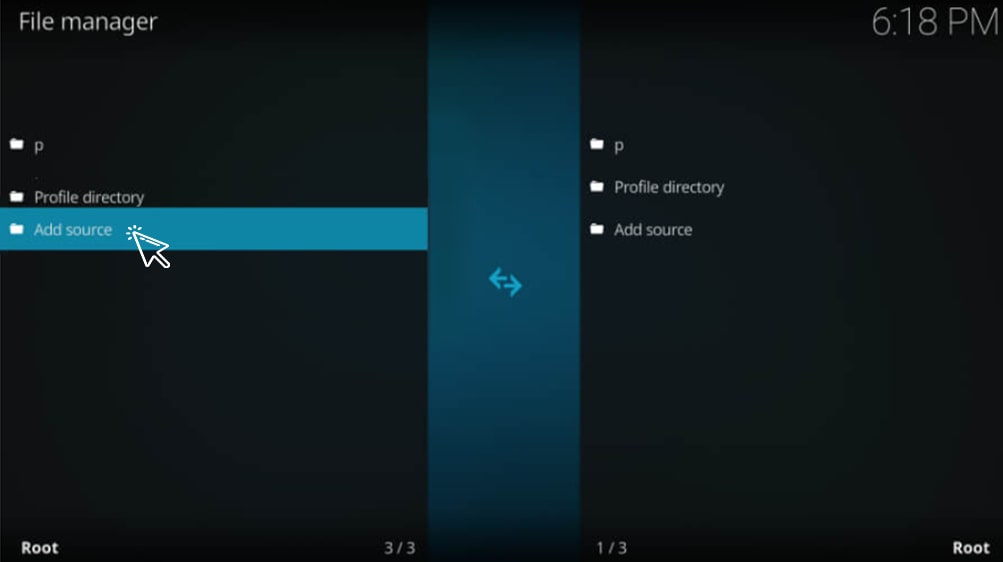
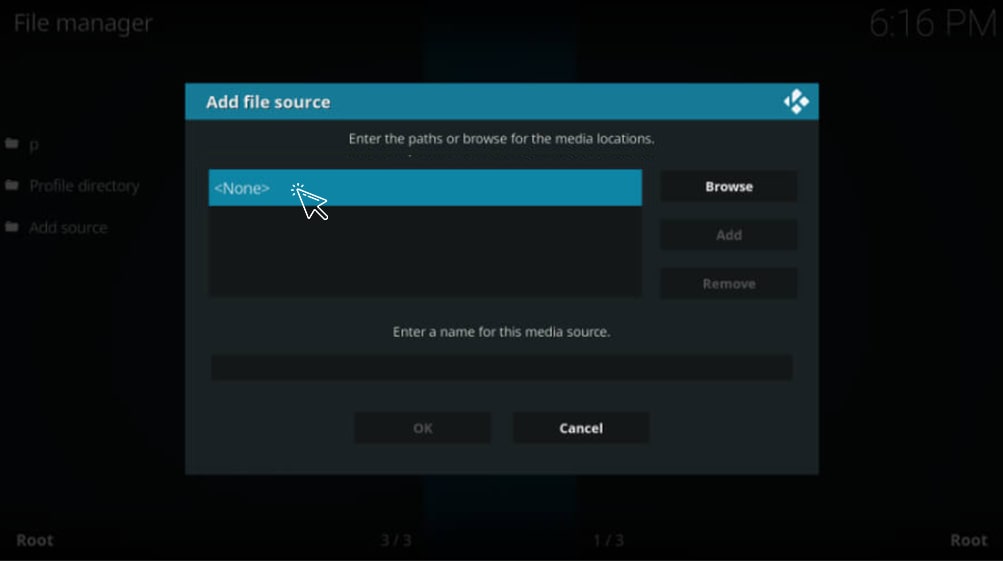
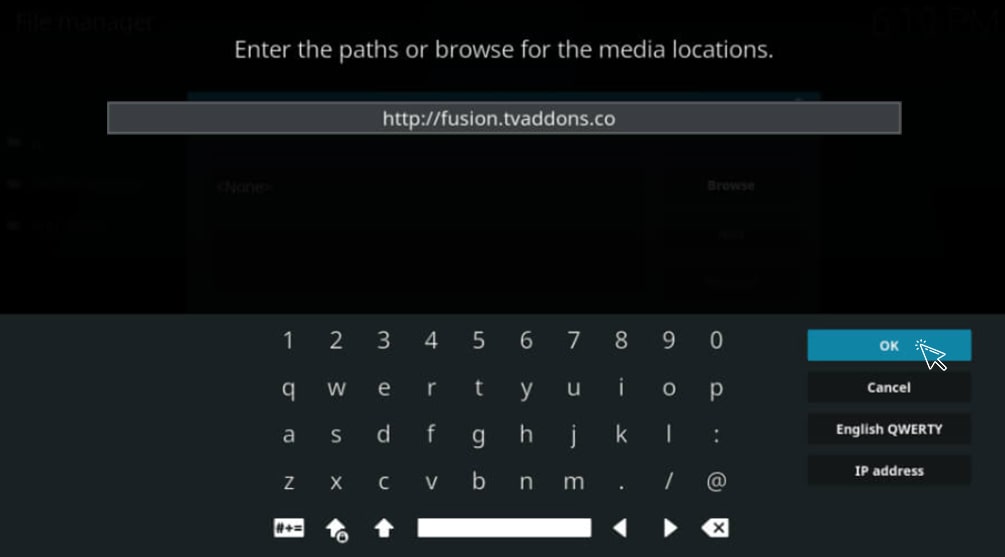
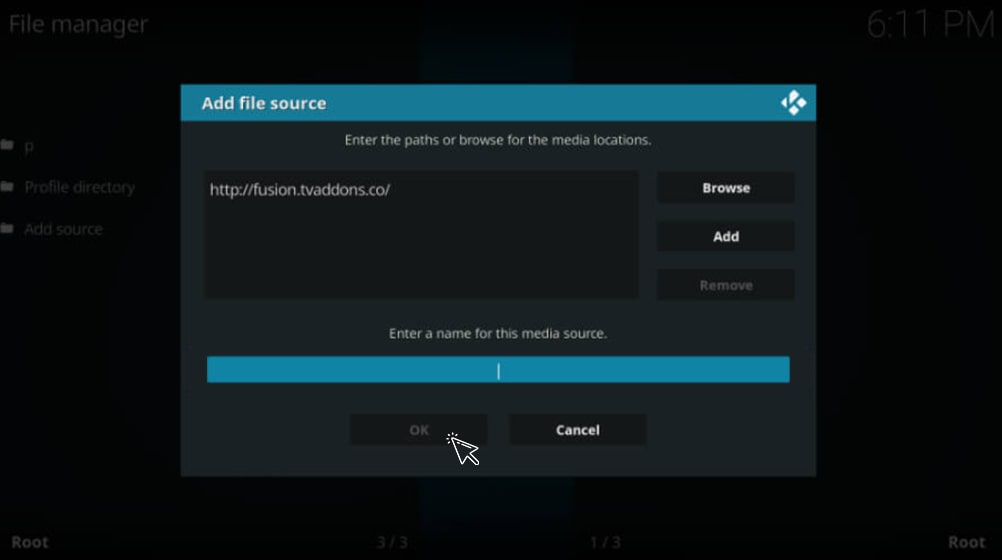
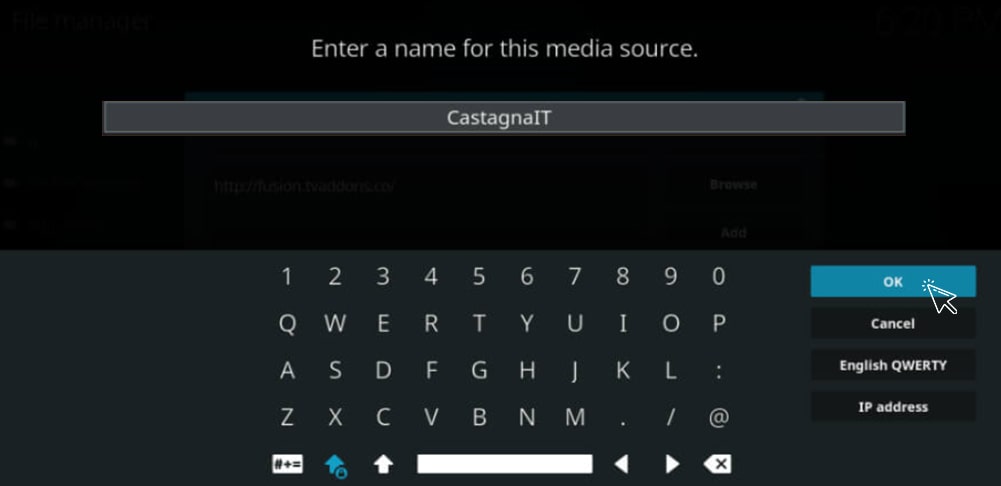
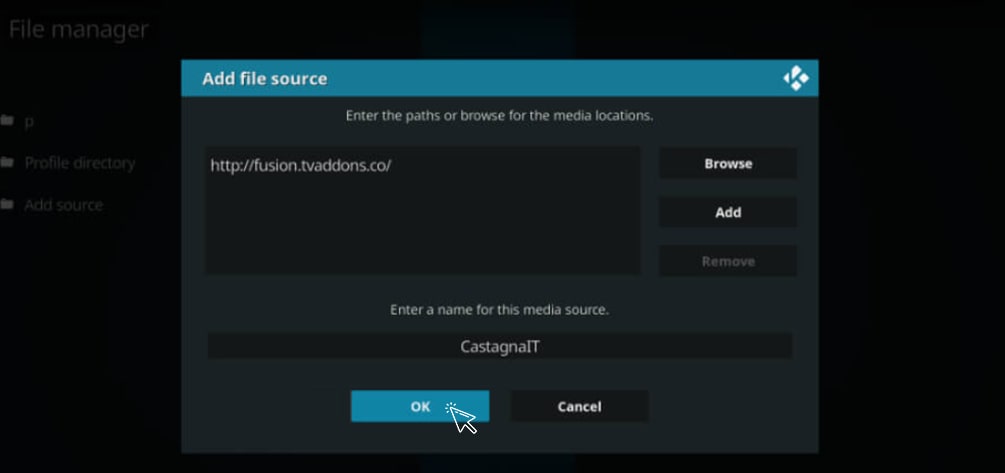
The source has now been added.
2nd PROCESS: CastagnaIT Repository installation instructions
Then we’ll install the CastagnaIT repository on Kodi using the source we added earlier. The Netflix addon will subsequently be installed with the help of the CastagnaIT repository.
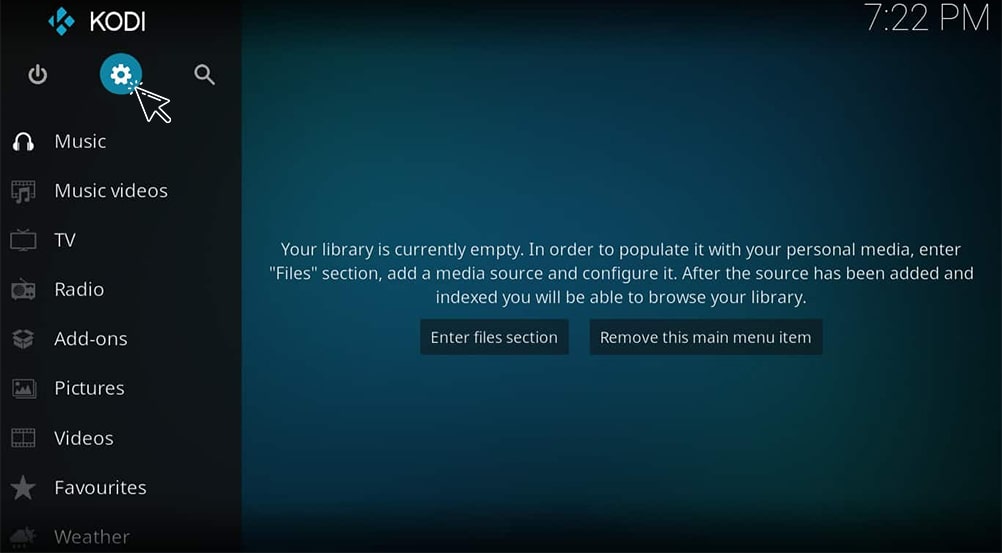
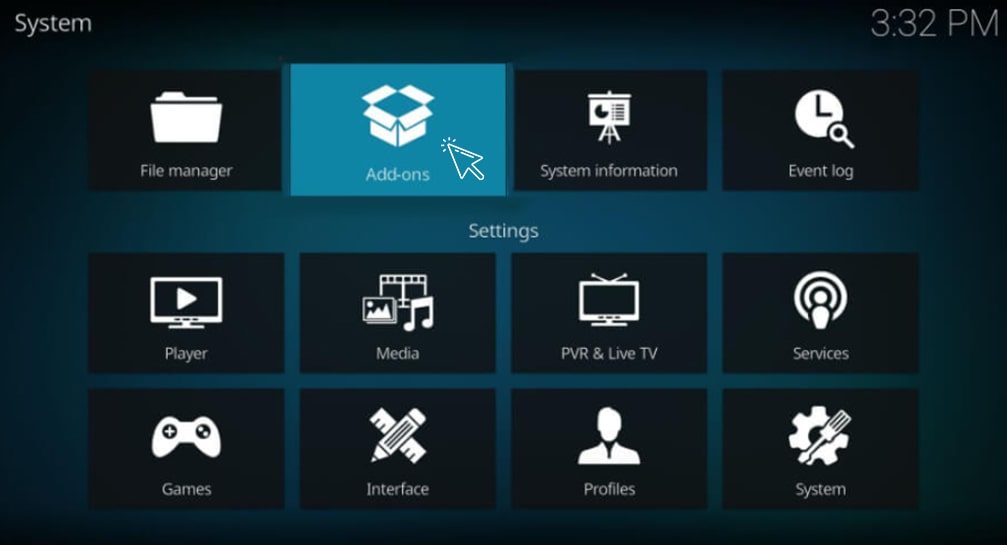
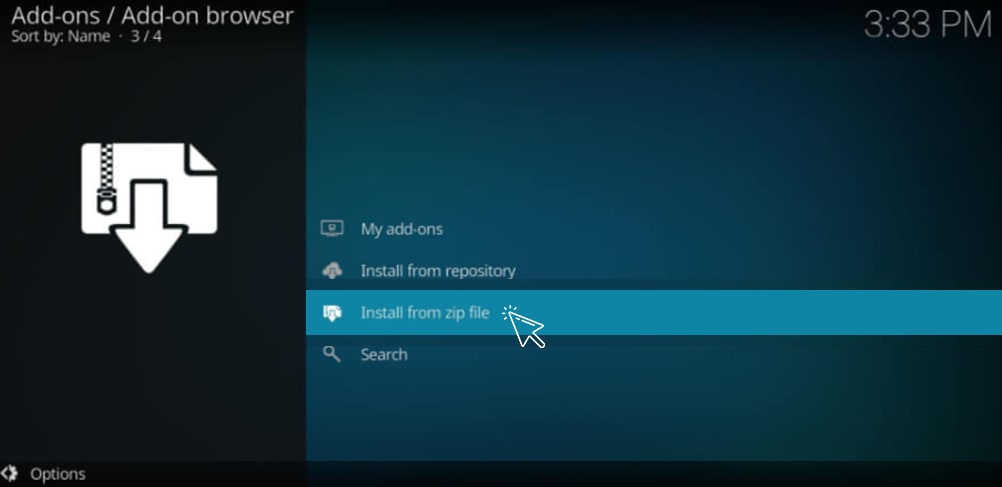
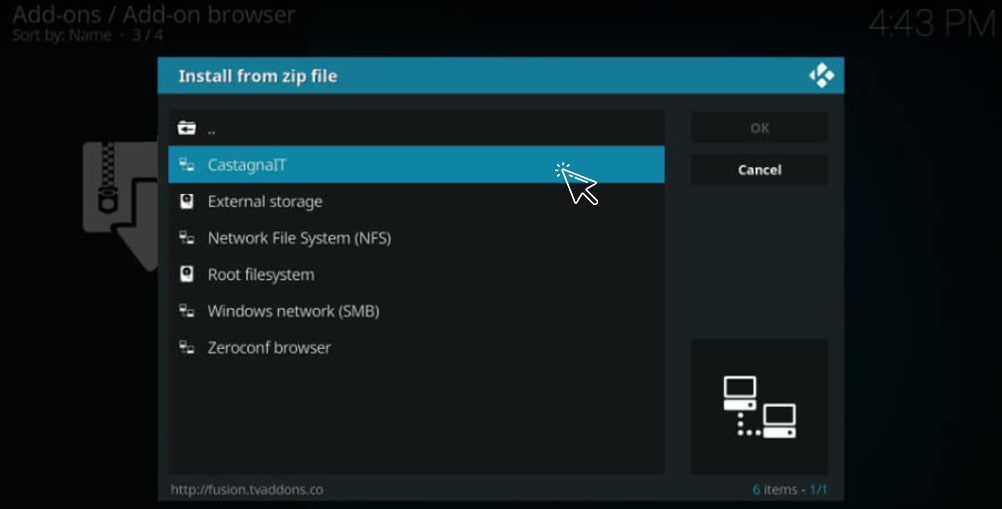
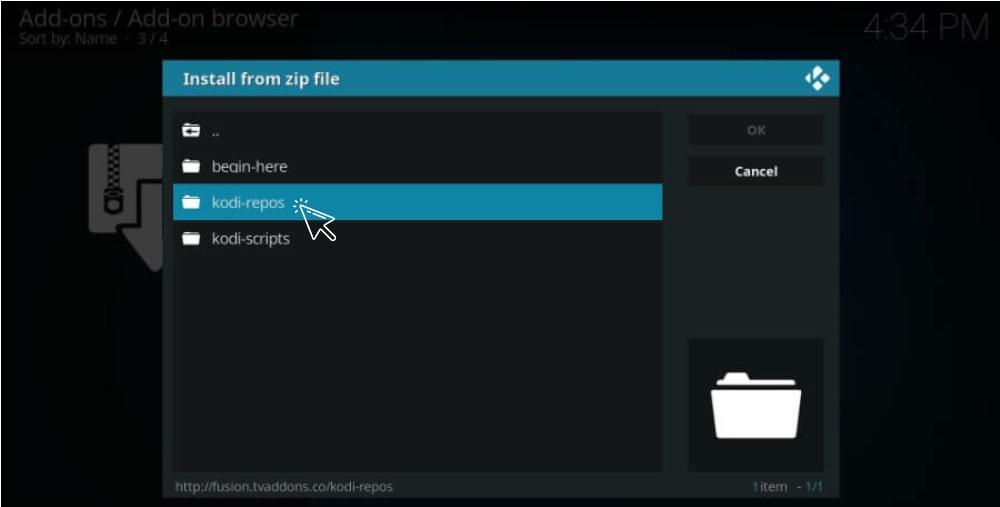
NOTE: Before.zip, you might see the various figures. There’s no need to be concerned. As the file version changes, the numbers might vary.
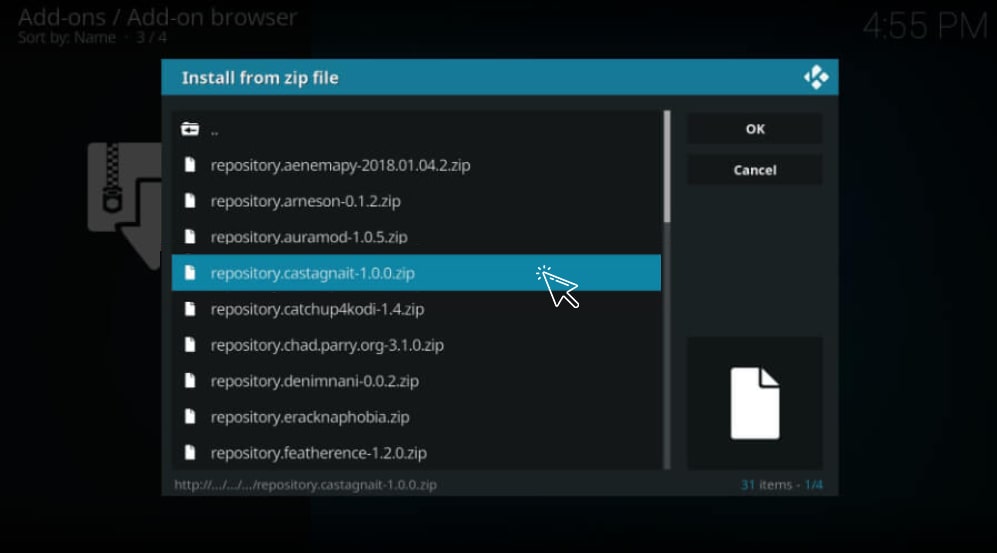
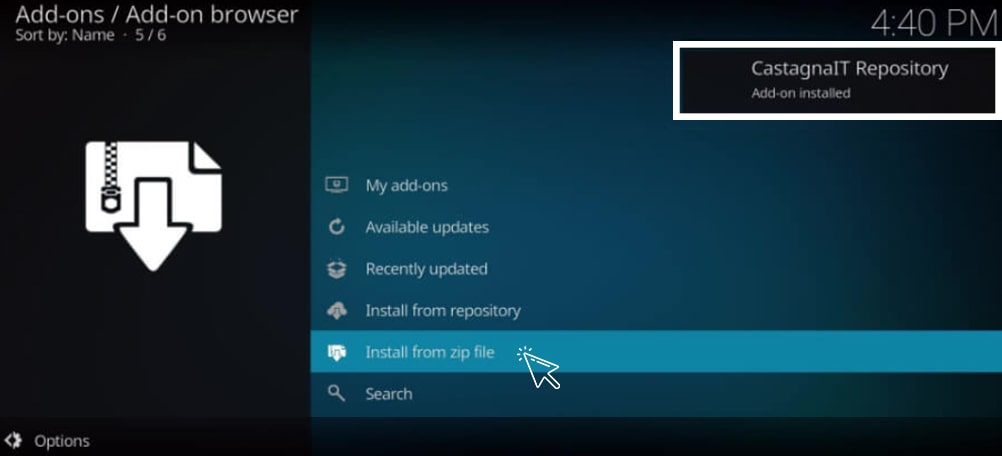
You have successfully installed the CastagnaIT repository.
It’s finally here. It’s the moment we’ve all been waiting for. Now, without further ado, let’s get Netflix installed.
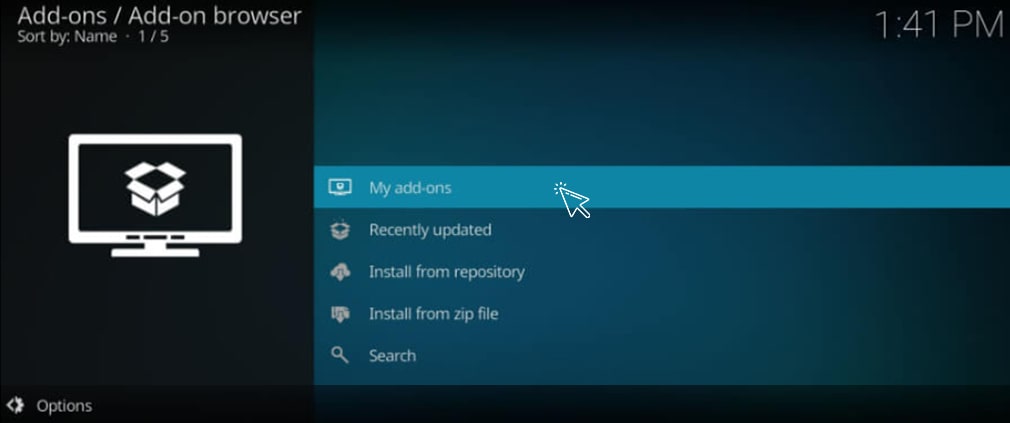
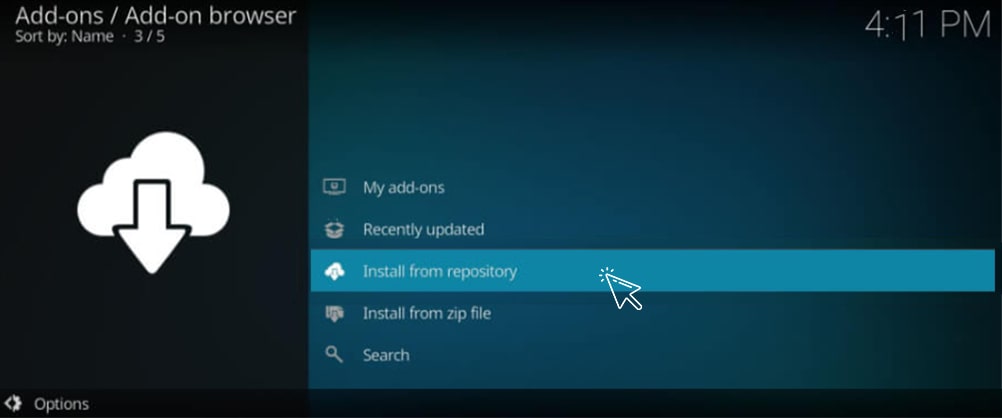
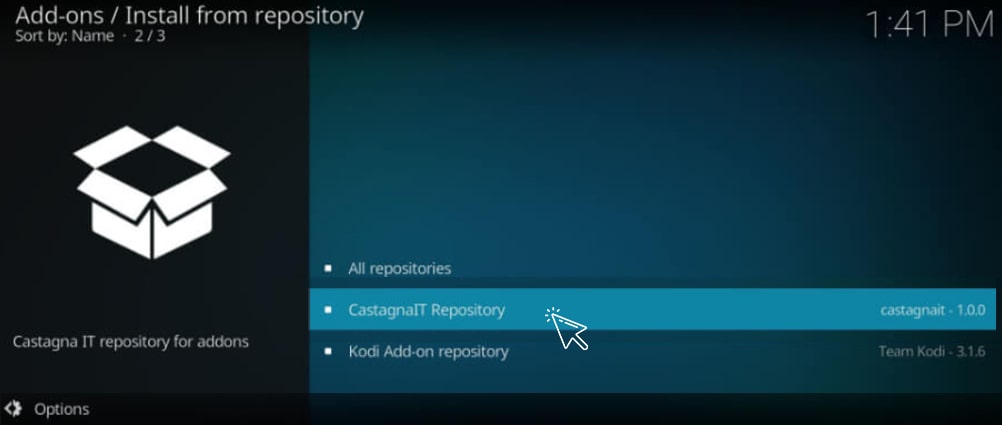
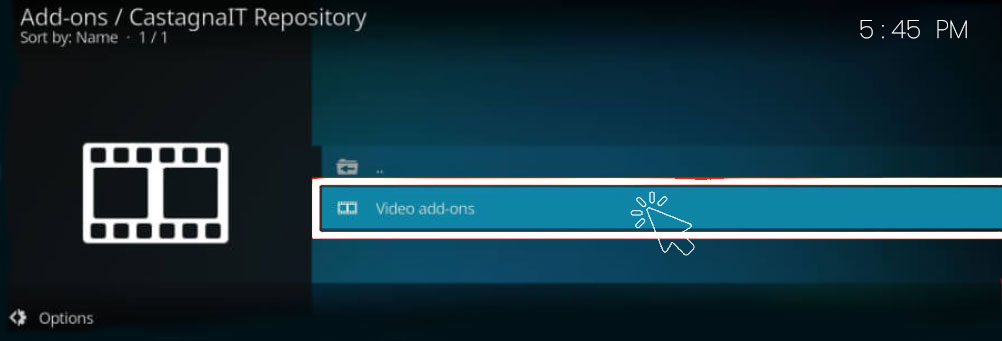
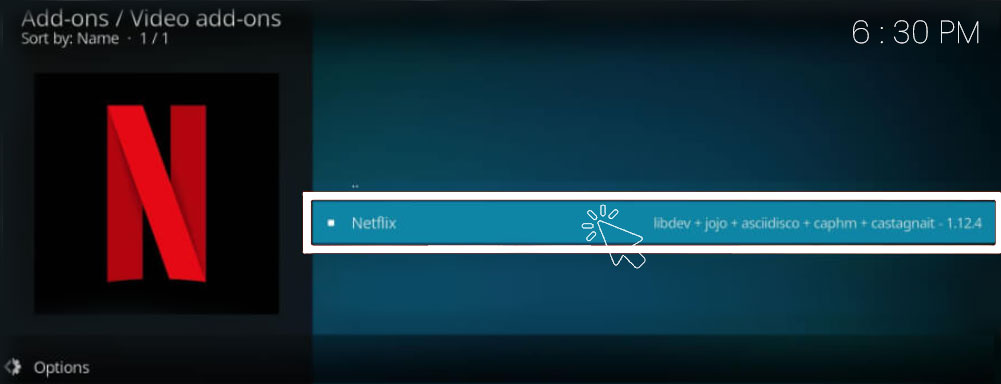
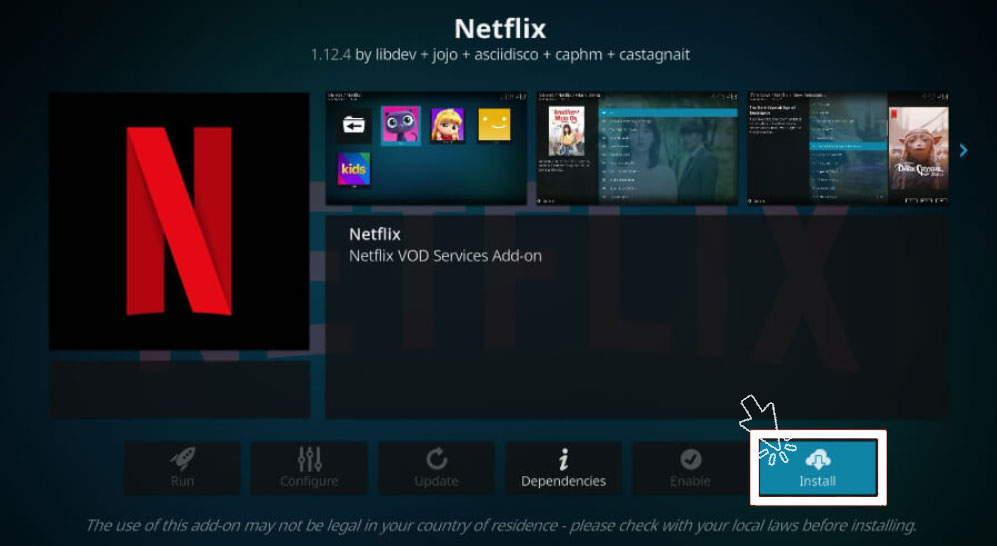
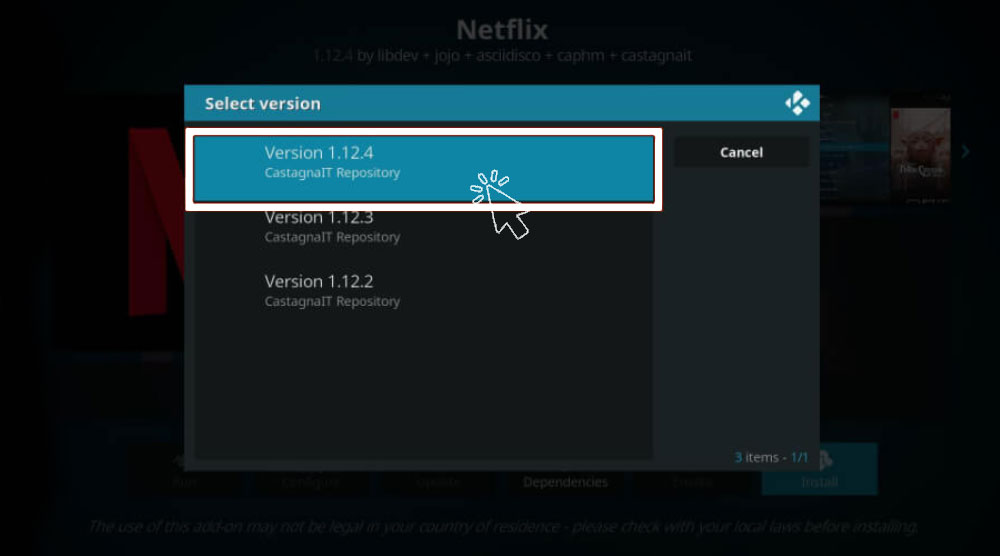
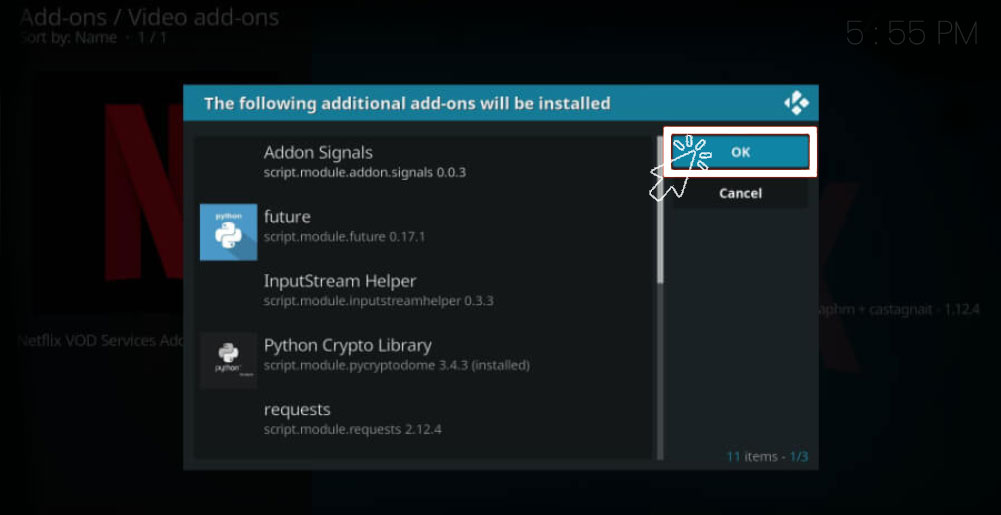
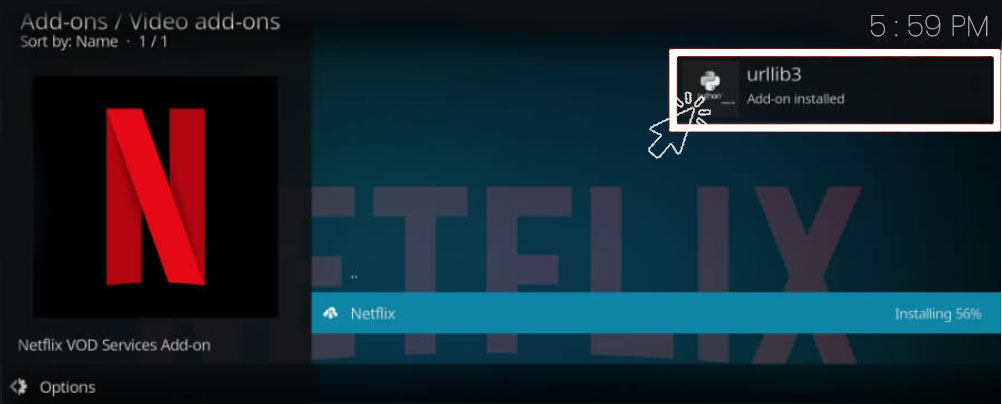
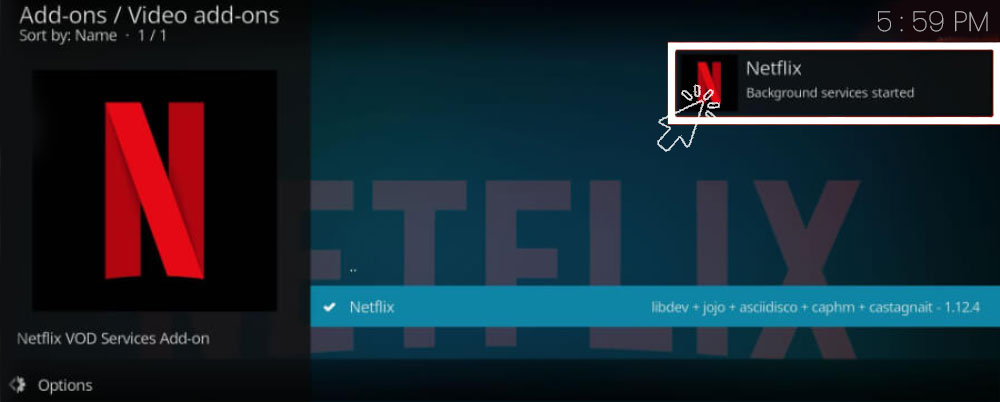
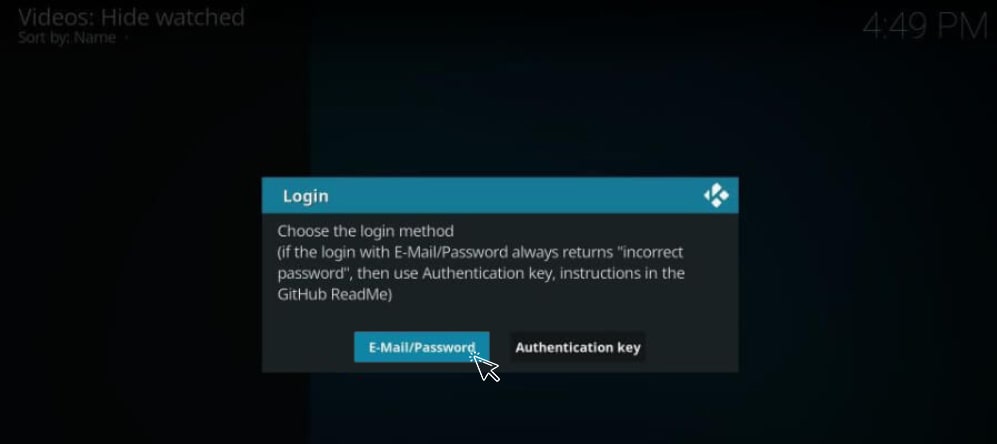
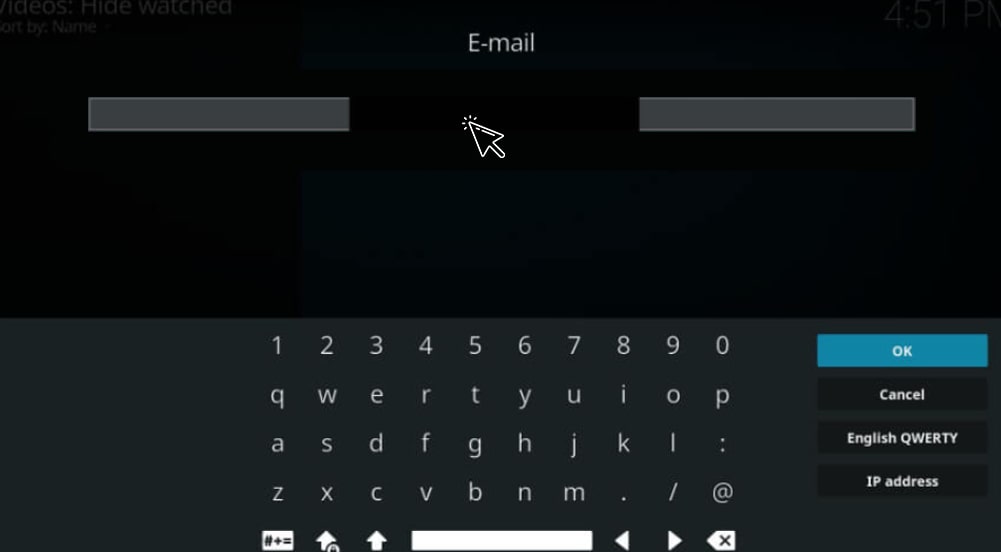
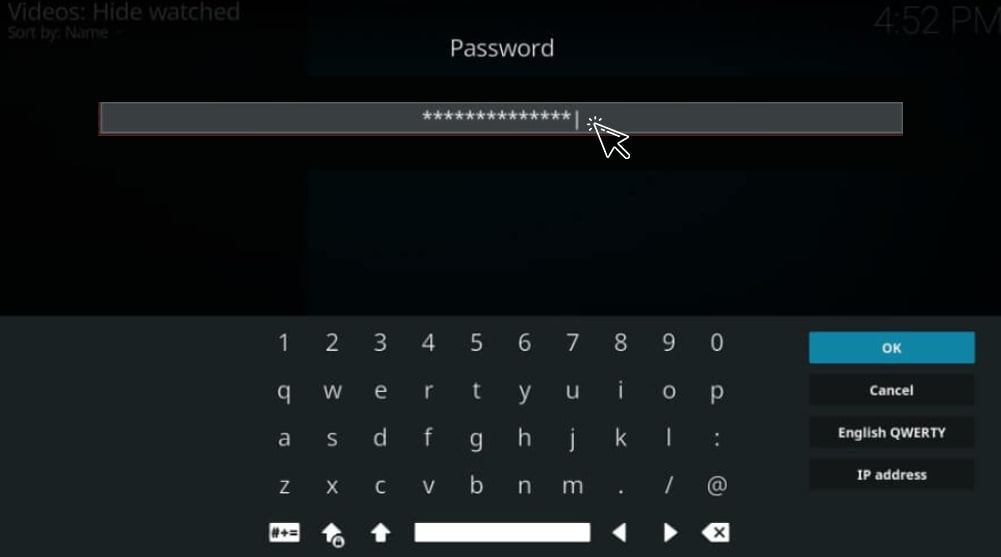
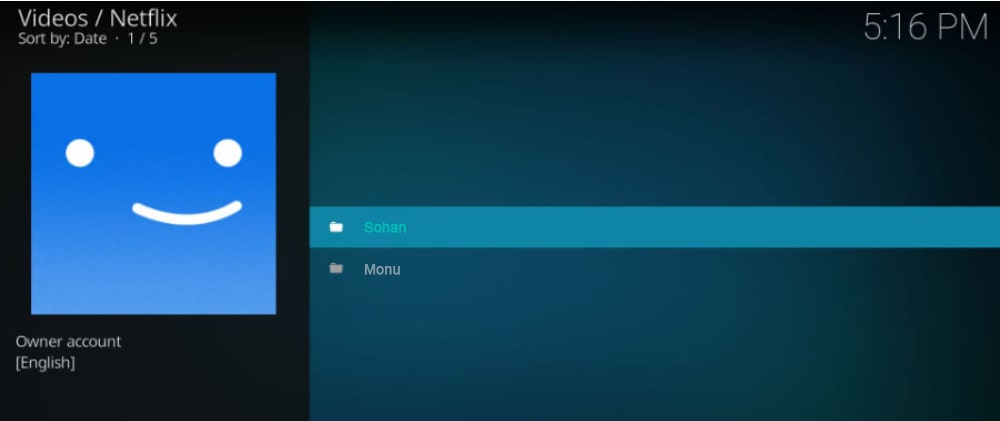
The Netflix addon on Kodi, like the real Netflix software, requires a setup the first time you use it. Following that, you’ll be able to begin streaming.
So, we’ll explain to you how to install Netflix for the first time on Kodi. Then we’ll look at the Netflix addon in more detail.
NOTE: In the United States, Netflix’s basic plan starts at $8.99. However, I recommend that you see if you qualify for a free Netflix account. If not, this simple approach will still get you a Netflix subscription for only $2.5 per month.
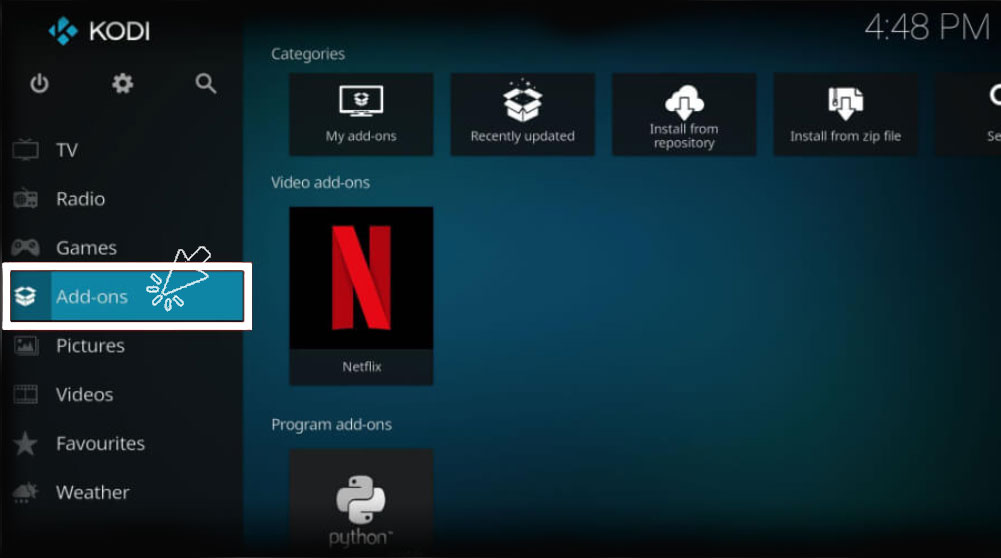
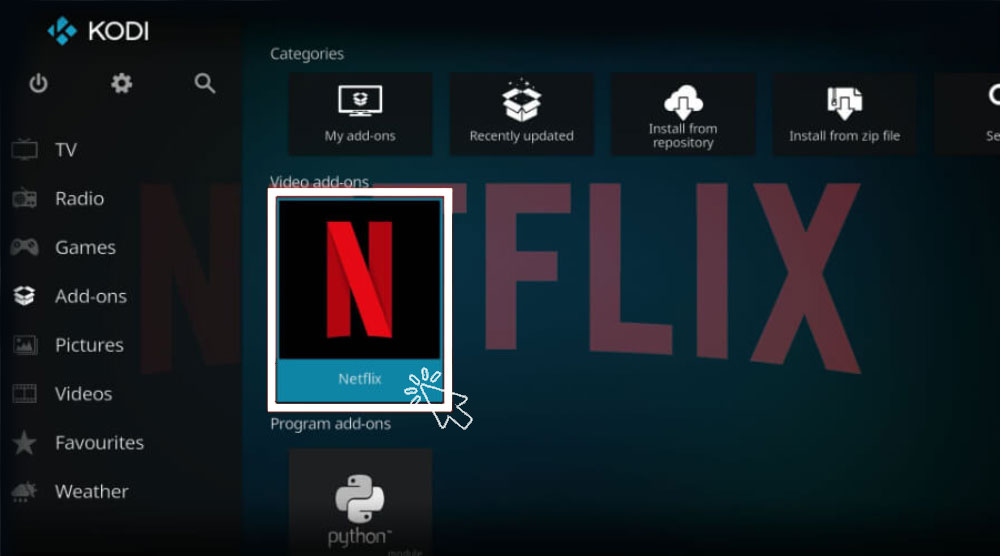
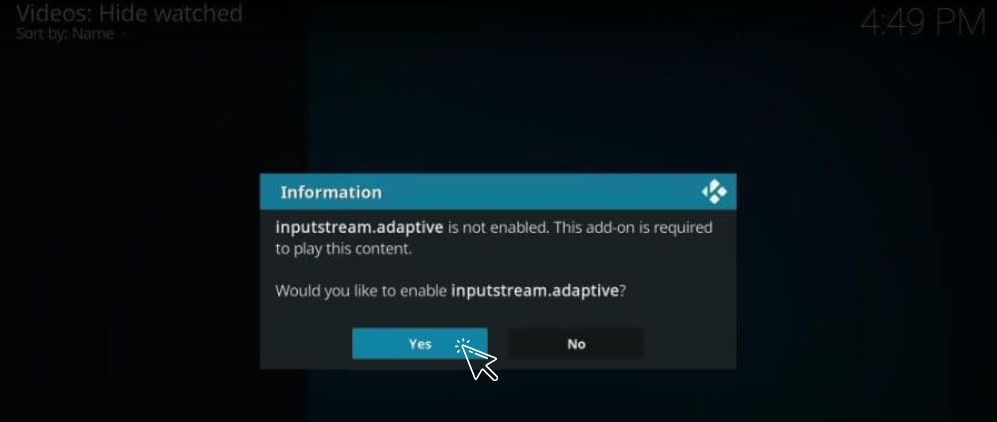
We hope you liked this detailed and illustrative guide. Let us know in the comments sections if you faced any difficulties, we’ll be happy to help you! You can also check out our guide on how to get Netflix for free forever
Published On : May 3, 2022 by: Sakshi/Category(s) : Netflix
Leave a Reply