Home » Healthcare » Login or Register to Availity for a Costless Communication
Login or Register to Availity for a Costless Communication
If you are looking for a reliable health information network then Availity is for you. It’s one of the most significant health information networks in the United States. 4 billion transactions have been processed by Availity with connecting over 2 million healthcare providers and there are approximately 2,000 technology partners to health plans worldwide. Everyone works with payers on daily basis and sometimes those endless transactions are complicated. Your task will feel light when you are able to connect with your payers conveniently. It’s everything you would ever need. Starting from the patient’s eligibility to the final resolution of your reimbursement.
You can have many ways to connect to your payers through Availity. You just need to register to Availity and you are down to your path. You get a provider portal that allows you free real-time access.
Who will be benefited from the Availity web portal?
The people who will be benefited from the Availity Health Information Network are listed below which mainly includes the health care providers-
- Physicians offices, single providers, and multi-specialty practices
- Hospitals along with an integrated delivery network
- Pharmacies
- Imaging centers, laboratories, and ancillary providers
Requirements for registration-
The requirements mentioned below will assure you a secure data interface and user-friendly experience by Availity-
- You need to have a high-speed internet connection to have the process run faster.
- The Microsoft Internet Explorer needs to be the 6.0 version or else the web browser that would be compatible with 128-bit encryption.
- 800 x 600 pixel or above greater monitor display.
Register to Availity-
If you are wishing to register to Availity then kindly visit the website given here to initiate the process- http://www.availity.com/. When you visit this website you will see an option ‘’Register’’ which you need to tap on. This option is present on the left side of the screen.
Things you will need when you register to Availity-
- Your personal details such as your full name, address, and federal tax ID number.
- PCA- Primary Controlling Authority- the person who holds the legal authority to sign the agreements for your organization. Ideally an owner or senior partner.
- PAA- Primary Access Administrator- in order to verify such official things as roles and identities, allowing access to the staff according to the role, keeping up with the user access and information regarding the business. In simple terms, the manager or administrator is this person who is appointed by the PCA, however, the role can be taken by the PCA is necessary.
You need to print this information ad further faxed to Availity at (904) 470- 4770.
At every step of registration, you will find instructions leading you through the way. There is also a bar that indicates how much is left in the process?
The first step to register to Availity –
- The first step is ‘’Tell us about yourself’’. In this step, you have to enter the information that will be asked of you.
- If you are an existing user of Availity then you need to tap on the ‘’Yes’’ option to the very first question ‘’Do you have an Availity account’’?
- If you don’t already have an Availity account then continue to the steps mentioned here.
- You need to enter your first name, last name, phone number, email address, re-enter the email address to confirm, now create a user ID.
- Now comes the next section which is ‘’Tell us about your organization’’. This will ask the information regarding your organization.
- Tap on the ‘’Provider option’’ for the statement ‘My organization is a ….’’.
- Now type the name of your organization, TAX ID, organization NPI, and the type provider. Kidly do not choose the ‘’School’’ option in the provider’s type.
- Now tap on the option ‘’Next’’ and you will be displayed the ‘’Your organization info page’’. Enter all the additional fields.
- Kindly do not choose the ‘’NIP is not required for this organization’’ option. You can only check this box when your organization is not related to health care and is not even eligible to acquire a NIP.
- If your billing address and physical address are different then clear the option ‘’Billing address is the same as physical address’’ and further type your billing address in the respective field.
- Tap on the ‘’My organization does business in more than one region’’ if your organization does contracts with payers in states. After checking that box select the regions.
- In case you don’t find your region then tap on the option ‘’I don’t see my organization’’.
- If you find your region then tap on the ‘’Next’’ option.
**Note– If by any chance you are having an issue or want to ask any question then you can use the Chat Live Now option that is displayed in the upper-right corner of the page. You can start chatting with the client service representative right away.
Second section-
- ‘’Your Administrator Page’’ will be presented to you in this section. You will have to provide the information of the people who take the responsibility for administrating Availity within your organization.
- PCA- Primary Controlling Authority and PAA- Primary Access Administrator. ( The meanings of these terms are mentioned above in this article).
- In case you are the PCA or PAA then you don’t need to type in your information again, the system will carry forward your information for the first section- Tell Us about yourself.
Third section-
- This is the Review and Submit registration page. What things can be done on this page are listed here-
- The information that has been added by you can be edited for the organization.
- You can not change the ‘’organization type’’. If you want to change it then all the information that has been entered will be reset.
- You can review and modify the details of PCA and PAA.
- The page can be printed from here.
- If you are done reviewing the form then you can proceed with clicking on the ‘’Submit registration’’.
Additional steps to register to Availity-
These are the additional steps that you need to follow after you complete entering the information in your application form.
- Now you will receive the application ID along with the guidelines about the next steps.
- You need to print the documents that incorporate-
- Availity application- this is the application that is filled with your information entered by you and user ID or Availity of the PAA.
- BAA– Business associate trading partner agreement- this ensures the responsibilities of both the parties with the protected data of health information- PHI.
- The sign of PCA is mandatory with the date of application completion.
- The date and sign of PCA would be witnessed by another person.
- Now the completed and signed application form can be mailed to Availity.
- You can expect the following emails from Availity after you are done with the application process- ‘’Thank you for registering’’ and ‘’Welcome to Availity’’.
If you are already done with the process to register to Availity then the next step is to log in to Availity. Continue reading the following steps to successfully logged into Availity-
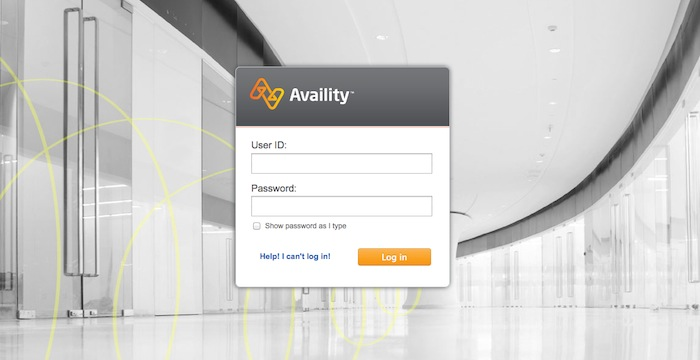
Login process of Availity
- Start by visiting the official login website of Availity- Log In to Availity®.
- Once you are on that website, there are two fields given for you. Enter your user ID in the first field and your password in the text field.
- Tap on the option ‘’Log in’’ if you have entered both fields.
- In case you have forgotten your password or user ID you can click on the option given below these two fields.
- If you remember, then proceed with the step mentioned above in the previous one.
How can send claims to Availity?
- You need to first create a claim file through your current billing software.
- Now login to http://www.availity.com/.
- Now you will be displayed the option ‘’EDI File Management/ Send and Receive EDI files. Tap on that option.
- Click on the option ‘’Send Files’’ mailbox.
- Now search for the batch claim files and hit on them.
- Tap on the option ‘’Upload file’’ and Availity will send the claims to the appropriate payers right away.
- Get the responses, claim errors, reports which you will find in the section ‘’Receive Files’’ mailbox.
It’s all done. All the processes which are necessary regarding Availity are mentioned for you. You can work with any of the processes you need to. Remember while doing the registration process be cautious and don’t make any mistakes.
Published On : October 28, 2021 by: Miti Sharma/Category(s) : Healthcare

Leave a Reply